MANUAL
ELECTRÓNICO
AUDI Q5
(2009)
INICIO
Manual A1
Manual A3
Manual A4
Manual A5
Manual A6
Manual A8
Manual Q3
Manual Q5
Manual Q7
Manual TT
Back
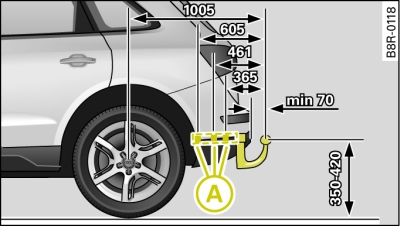
Fig. 1 Positions of securing points (side view)
Back